1] Installation Of Wp-Pagenavi Plugin
To use this plugin you must have Wp-PageNavi installed so install that plugin first.
You can either install it automatically from the WordPress admin, or do it manually:
- Unzip the archive and put the wp-pagenavi folder into your plugins folder (/wp-content/plugins/).
- Activate the plugin from the Plugins menu.

Usage
In your theme, replace code like this:
|
1
2
3
4
5
6
|
<div class="navigation"> <div class="nav-previous"><?php next_posts_link( __( '<span>←</span> Older posts', 'twentyten' ) ); ?></div> <div class="nav-next"><?php previous_posts_link( __( 'Newer posts <span>→</span>', 'twentyten' ) ); ?></div></div>Download WordPress PageNavi Style Plugin <a href="http://wordpress.org/extend/plugins/wp-pagenavi-style/" title="wp pagenavi style" target="_blank">Here</a> |
with In your theme, replace code like this:
|
1
|
<?php if(function_exists('wp_pagenavi')) { wp_pagenavi(); } ?> |
If you already have Installed Wp-PageNavi plugin and Added above code then move to next step.
2] Installation Of WP PageNavi Style Plugin
- Upload the “wp-pagenavi-style” folder to your /wp-content/plugins/ directory.
- Login to your admin section, go to the Plugins section and activate the Wp PageNavi Style plugin.
- You can access the settings page using the PageNavi Style menu item, where you can adjust the default settings for the WP PageNavi Style Plugin.
Usage
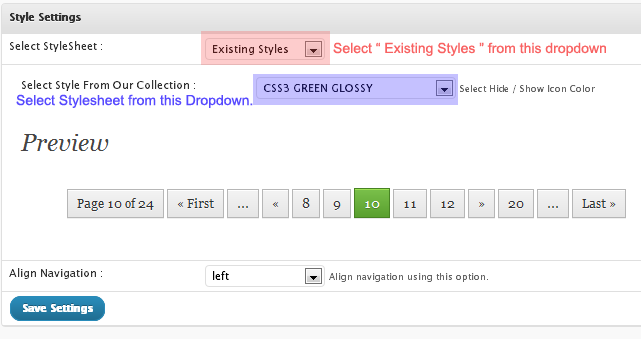
If you want to use style which comes with Wp PageNavi Style Plugin then select “Existing Styles” from “Select StyleSheet :” dropdown. After that you can select your style from our collection in next dropdown.

And Save you settings.
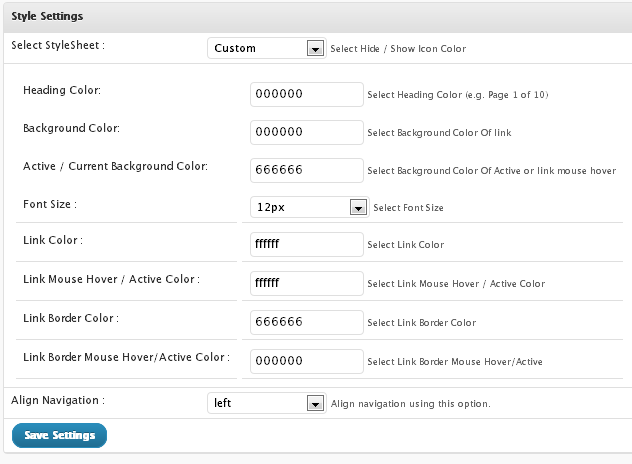
If you want to use Custom style then select custom style from first dropdown. and select your colors and options from


